Note: this document is undergoing major changes and is currently a mix of older and updated content.

User Manual
Note: this document is undergoing major changes and is currently a mix of older and updated content.
Most features of the engine can by used by typing text commands into the command console. Both the client and the dedicated have their own console: the one on the dedicated server is always visible, and is the only way to send commands to the server. The command console in the client is usually hidden and can be opened by pressing the ~ key.
Some commands are only available on a server, other commands are only available while running a client. If you are playing a local game, you are actually running your own local server and server commands will als be available through the client command console as well.
If you open the client console or look at the server console will see all messages the server has send to the console so far. You can scroll up and down using page up and page down to see older messages. The client console can also be scrolled using the mousewheel.
Warning messages are usually printed in yellow, important error message in red. If you encounter problems, the console is usually the best place to look for information.
The console can be used to change a number of configuration variables: these variables are used to store various settings and by changing these values the engine and the game can be customized to the user's preference.
The list_var functions will print a list of available variables: type list_var on the console followed by enter.
>list_var
 A   cl_color 1 1 .5 [r g b] player primary color
 A   cl_colorsecond 1 .5 0 [r g b] player secondary color
 .
 .
 .
 A   sv_name osirion server [string] server name
 A   sv_password  [string] server rcon password
     sv_private 0 [bool] enable or disable network server for a client
  Flags: A=Archive G=Game R=ReadOnly
  71 registered variables
For each available variable, the list_var function will print the variable's flags, name, its current value and a short description. To inspect the current value of a single variable, just type its name on the console followed by enter.
>sv_name
  sv_name osirion server [string] server name
To change the value of a variable, type its name and the new value on the console followed by enter. The console will show the new value:
>sv_name My Osirion Server
  sv_name My Osirion Server [string] server name
Some variables have special flags, as shown in the first column of the output of the list_var function.
On exit, both the client and the server will save variables with the Archive flag to their config file, client.cfg or server.cfg. Variables with the Game flag set will be saved to the file game.cfg. If you run into trouble, you can delete these files to restore the default values.
On Linux and other UNIX-like systems you can find these files in the directory ~/.osirion/base.
On windows you can find these files in My Documents/My Games/Osirion/base.
Besides variables, the engine also support functions that can be executed. These are commands that can be typed into the console that will trigger some kind of response.
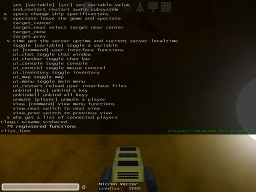
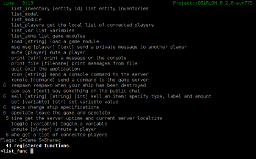
In the previous section we had already met the list_var function, which will print a list of available variables to the console. Similar, the list_var function, wich will print a list of available functions:
>list_func
    bind [key] [str] bind a command to a key
    connect [ip] without ip, create a game
    disconnect leave the current game
 G  intro [int] view specified introduction
 .
 .
 .
    view_next switch to next view
    view_prev switch to previous view
  S who get a list of connected players
Flags: G=Game S=Shared
  61 registered functions
Type a function's name into the console followed by enter to execute it. Some functions require aditional parameters to work currectly.
Like variables, functions can have special flags that indicates their type:
To understand the flow of commands we illustrate three different situations:

Starting the client will show the loader screen and open the client console. The console will stay open until you are connected to a game. Once connected you can close and open it again with the ESC key.
Type connect and press Enter. You will join the game as spectator, type join in the console to join the game. Type spectate to spectate again. Type disconnect to return to the loader screen.
To connect to a dedicated server, type connect address, where adress is the hostname or IP address of the remote server.
If you started a local game and want to have a quick look around you can enable cheats by setting the g_devel variable. Once cheats are enabled, you can use the give ship command to try out new ships ad the give cargo command to fill up your cargo hold for free.
This example will swap your current ship for the Micron Matrix model, and fill its cargo hold with 5 units of gold:
g_devel 1
give ship matrix
give cargo gold 5
You can also eject the cargo into space:
eject cargo gold 5
A particulary amusing way to test the engine is the following command combo (the double qoutes are mandatory):
bind k "give cargo gold 1; eject cargo gold 1"
This command combination will make the k key spit a cargo pod into space.
Keyboard controls can be configured with the bind command. A key can be bound to an action or a console command. An action always starts with a plus or minus sign.
To bind the keypad left key to the turn left action:
bind kpleft +left
To bind the P key to the screenshot command:
bind p screenshot
You can use the list_binds command to get a list of currently bound keys. Use the list_keys command to get a list of all available key names.
The default configuration:
| ESC or ` | toggle console |
| v | next camera view |
| shift+v | previous camera view |
| left right up down | rotate camera in free view |
| keypad left right | direction |
| keypad up down | pitch |
| keypad home pgup | roll |
| keypad + - | increase/decrease forward thruster |
| space bar | toggle mouse control on or off |
| tab | kinetic impulse drive control |
| a d | strafe |
| q e | roll |
| w s | afterburner/reverse |
| n | select next target |
| shift+n | select previous target |
| ctrl+n | deselect current target |
| t | chat box |
| enter | chat window |
| print screen | screenshot |
If you have choosen Track or cockpit view and mouse control is actived, you can use it to steer your vessel. In Free view mode, the mouse will rotate the camera. If mouse control it is deactived, you can temporarily activate it by pressing the left mouse button.
Use the scroll wheel to increase/decrease thruster.
Mouse buttons can also be configured through the bind command.
Joystick support is only preliminary and disabled by default. A list of detected joysticks will apear in the startup messages. To use a joystick set the input_joystick variable to the desired joystick number:
input_joystick 1
The axes are hardcoded and can not be configured. Axis 0 controls pitch, axis 1 controls direction, axis 2 control roll. There is no way to callibrate the joystick, you will have to use an external joystick calibration program.
Up to 16 joystick buttons will be reckognized. They can be configured by assigning a command or action to keys joy0 through joy15. For example, to configure the first button to activate or deactivate the kinetic impulse drive:
bind joy0 impulse
The following commands are always available on the console:
| connect | connect the client to the game module |
| disconnect | disconnect the client from the game module |
| list_ent | list registered entities |
| list_func | list registered functions |
| list_model | list registered models |
| list_var | list registered variables |
| quit | exit the application |
| r_restart | restart the video subsystem |
The following commands are available when you are connected to a game:
| join | join the game |
| spectate | spectate |
| buy | purchase a new ship |
| jump | active the hyperspace jump drive |
| impulse | active the kinetic impulse drive |
| who | list connected players |
This list is far from complete. The list_func function will print all available functions with a short description.
A lot of settings can be changed through configuration variables. The list_var function will print all available variables with a short discription. To change the value of a variable, type its name followed by the new value.
e.g.: to disable rendering of the sky:
r_sky 0
to enable it again:
r_sky 1
To change the video resolution, set the r_width and r_height variables and execute r_restart. e.g.: to set the video mode to 1680x1050 type:
r_width 1680
r_height 1050
r_restart
To switch to fullscreen mode, set the r_fullscreen variable to 1:
r_fullscreen 1
You can set your name and player color through the cl_color and cl_name variables. Note that your ship's colour won't change until you buy a new one.
cl_name SpaceCadet
cl_color 1.0 1.0 0.0
connect
To activate statistics, set the draw_stats variable to 1:
draw_stats 1
This will draw the following statistics on the right side of the screen:
fps	average framerate, frames per second
tris	number of triangles
quads	number of quads
net	average network traffic, bytes per second
The framerate is limited to 1000 frames per second.
Variables marked with the 'A' flag will be archived. Their values will be loaded from and saved to the configuration files. The dedicated server reads its configuration from server.cfg, the client will use client.cfg. Keyboard binds will be saved to binds.cfg. Game settings will be saved to game.cfg.
On UNIX systems you can find these files in the directory ~/.osirion/base.
If you delete these files, the default configuration will be restored.

By default, the dedicated server will accept incoming connections on UDP port 8042. The server console is available if ncurses support was enabled at compile time.
If you have trouble connecting, try editing the server configuration file server.cfg and change the net_server variable to the server's actual IP address. The default listening port can be altered by changing the net_port variable.
Both the client and the dedicated server can parse command line options. Any console command can be added to the command line with + sign.
To start a client and connect to a remote server:
osirion +connect remote.server.org
To start a client and create a new network game:
osirion +set sv_private 1 +connect +join
To start a dedicated server and set the server name to My Osirion Server:
osiriond +set sv_name My Osirion Server
Note: setting variables from the command line can result in weird values being written to client.cfg and server.cfg. If you run into problems, check those files or delete them.
On windows32, the game uses the My Documents\My Games\Osirion subdirectory as your personal directory. For example, the client.ini can be found as My Documents\My Games\Osirion\base\client.ini.