Difference between revisions of "Creating skyboxes"
(Import from backup) |
(No difference)
|
Latest revision as of 18:08, 24 August 2014
A skybox is a set of six seamless images which are rendered on the inside of a large cube surrounding the player, and is sometimes referred to as environment map. In first-person shooters they're uduslly images of far away hills, forest and buildings, in spacegames they will display stars, nebulas and far away galaxies.
Installing Spacescape
Alex Peterson's Spacescape is a tool for creating space skyboxes with stars and nebulas. A windows versions is readily available from its website, if you want to use it on linux you will have to compile it yourself.
- Spacescape homepage
- Spacescape manual
- Download Spacescape for windows
- Download Project::OSiRiON flare textures and sky sources
Windows
Download the latest windows version. This is a ZIP file you have to unpack to a suitable location. You can use C:\Program Files (x86)\Spacescape or, if you have a 32bit system, C:\Program Files\Spacescape.
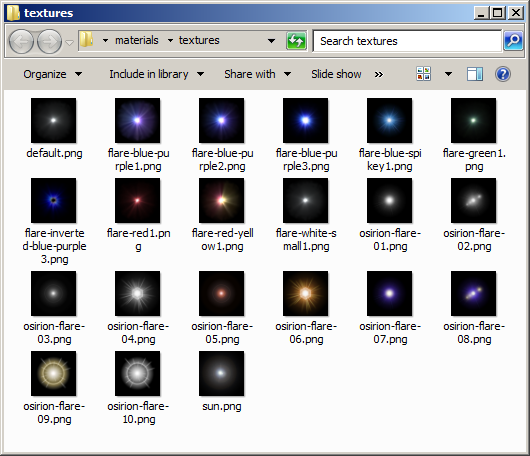
You should end up with a folder C:\Program Files (x86)\Spacescape containing Spacescape.exe and several subfolders. The Spacescape installation comes with a number of billboard star textures. Copy the flare textures for Project::OSiRiON to the folder C:\Program Files (x86)\Spacescape\media\materials\textures. You can also copy your own flare textures here.
Linux
To build Spacescape on linux, you will need a working C++ compiler, cmake, the Qt library (4.8.x), the NVIDIA Cg libraries and the OGRE library.
Building
You need a subversion or git client to download the source code.
 svn co https://spacescape.svn.sourceforge.net/svnroot/spacescape/trunk spacescape
 cd spacescape
Apply a required patch to fix image size selection in the export file dialog.
 wget http://osirion.org/files/spacescape/spacescape-svn-r15-export_file_dialog.patch
 patch -Np0 -i spacescape-svn-r15-export_file_dialog.patch
Create a build directory, enter it and run cmake to create the Makefiles.
 mkdir build
 cd build
 cmake -D QtPropertyBrowser_Library_DBG:BOOL=0 ..
Build the binaries.
make
On my system, the build fails with the following error:
undefined reference to symbol '_ZN5boost6system15system_categoryEv'
To correct this error edit the following file inside the build/ directory:
Spacescape/CMakeFiles/Spacescape.dir/link.txt
This file contains a single, long line. Find the part that looks like this:
../../Spacescape/app/linux/bin/Plugin_Spacescape.so -lOgreMain -lQtGui -lQtCore
Add -lboost_system in front of -lOgreMain
../../Spacescape/app/linux/bin/Plugin_Spacescape.so -lboost_system -lOgreMain -lQtGui -lQtCore
Run make again
make
Leave the build/ directory, the resulting binary will be in Spacescape/app/linux/bin/ Copy the necessary libraries.
 cd ..
 cd Spacescape/app/linux/bin/
 cp -a ../../../external/QtPropertyBrowser/lib/libQtSolutions_PropertyBrowser-2.5.so* ./
Installing the OGRE Spacescape plugin
Part of spacescape is a plugin for the OGRE library. The file Plugin_Spacescape.so must be installed as root in the OGRE plugin directory.
sudo install Plugin_Spacescape.so /usr/lib/OGRE/
Running
Run the program:
LD_LIBRARY_PATH=./ ./Spacescape.bin
Installing media
You need to install the flare textures for For Project::OSiRiON. Copy the PNG images in sky/flares to the Spacescape media folder spacescape/Spacescape/media/materials/textures.
Spacescape Tutorial
Like many graphical design programs, Spacescape uses layers drawn on top of each other to create the final image. Each layer has its own set of settings which can be tweaked to achieve a pleasing result. Skyboxes are saved as XML files, you can load any of the Project::OSiRiON sky files as example.
The user interface of the application is reasonably simple: the left side of the screen contains a list of layers. Each layer can be expanded to show its settings. The right side of the screen is the preview window. You can rotate the skybox preview by dragging the image while holding the mouse button.
In this tutorial we'll create a new skybox from scratch. Select File -> New from the menu.
Don't forget to consult the Spacescape manual for more information.
Point star layers
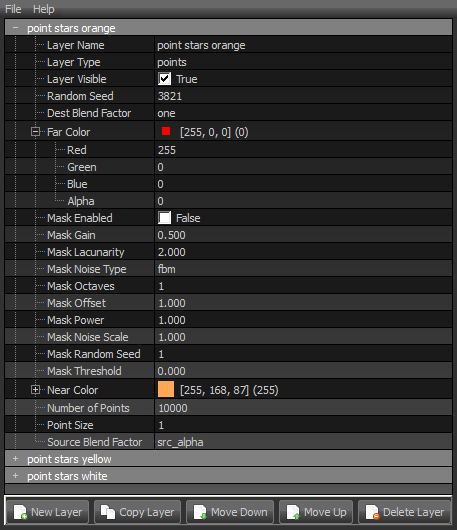
We start by creating a basic starfield. We'll add several star layers in different colors. Use the Add Layer button at the bottom to add a new layer. Expand the layer to edit its settings.
- Layer Name
- Give the layer a descriptive name like point stars white.
- Layer Type
- For point stars, the layer type should be points.
- Layer Visible
- Disable this option to hide a layer, leave the layer visible.
- Random Seed
- Changing the seed will alter the distribution of the stars, always change the seed for point star layers.
- Dest Blend Factor
- Leave on one for point star layers, see Blending
- Far Color
- The color of far away stars, leave it on black (0, 0, 0)
At this time, we won't use the Mask settings.
- Near Color
- The color of nearby stars, set to white (255, 255, 255)
- Number of Points
- Set to 10000.
- Point Size
- Number of pixels used to draw the star, leave it on 1.
- Source Blend Factor
- Leave on one for point star layers, see Blending
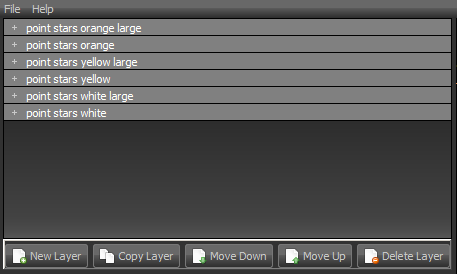
Use the Copy Layer button at the bottom to duplicate the layer two or three times. On each copy, change the Random Seed and the Near Color. You should end op with several layers of point stars in different colors.
You can improve the starfield by tweaking the colors even more. Expand the Far Color and set it to a non-black color. Set the alpha to 0. Enable alpha blending by setting the Source Blend Factor to src_alpha. This will a create a color gradient between far away and nearby stars, while blending far away stars into the dark background.
Next, we create a a large version for each star layer. Duplicate each point star layer and change the Number of Points to 2500. Change the Point Size to 2. Don't forget to change the Random Seed too! You should end op with six to eight point star layers, with half of the layers having Point Size 2. The result should be a reasonably rich starfield with stars in multiple colors.
Billboard star layers
Point star layers are a good base, but they remain simple dots on a black background. We'll introduce some variation by adding billboard star layers. Billboards are similar to points but use flare textures instead of dots. You can use any image in the folder C:\Program Files (x86)\Spacescape\media\materials\textures.
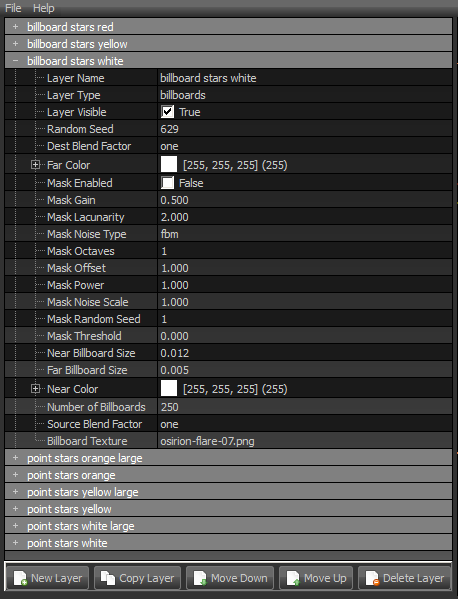
Create a new layer and call it billboard stars white, set the Layer Type to billboards. Most of the settings are the same as in point layers before: set the Random Seed, Near Color and Far Color. Next, apply the following settings:
- Number of Points
- Set to 250.
- Near Billboard Size
- Size of nearby stars, set to 0.012.
- Far Billboard Size
- Size of far away stars, set to 0.005.
- Billboard Texture
- Filename of the flare texture to use, you can leave the default or change it to osirion-flare-07.png or any other installed texture.
Like point star layers, copy the layer a few times, change the Layer Name, Random Seed, Far Color, Near Color and the Billboard Texture as desired. You should end up with around 3 layeres of billboard stars in different colors.
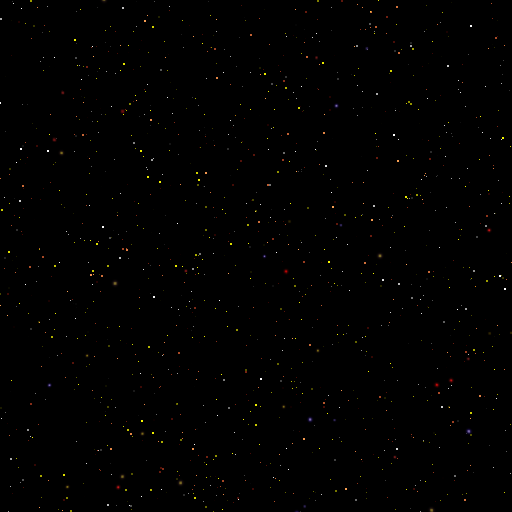
All these layers combine into a base background starfield:
Background dust layers
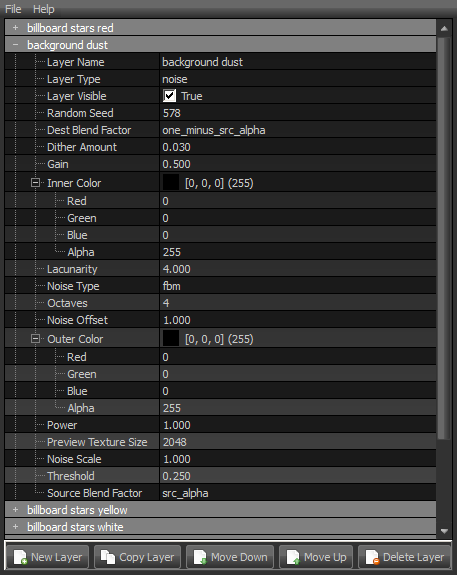
So far, the starfield is rather uniform in appearance. We add a layer of background dust to create the impression of darker and lighter areas in the sky. Add a new layer and name it background dust. Set the Layer Type to noise and set a Random Seed. Leave the Inner Color and Outer Color on default for now. We want a black dust layer and if you set the color now it will be very hard to see the dust while manipulating its shape.
You can manipulate the shape with the following parameters, it takes some experimenting to get the result you want:
- Lacunarity
- The cloudyness of the dust layer: low lacunarity will create more uniform dust, high lacunarity will give a more cloudy appearance. Set it to 4 for the background dust layer.
- Octaves
- Setting this parameter higher will result in more fine-detailed dust. Set it to 4 for the background dust layer.
- Power
- A higher power setting will result in brighter colors.
- Threshold
- A cutoff value below which the dust will not be rendered. It creates a more cloud-like appearance but can introduce hard edges. Set it to 0.25 for the background dust layer.
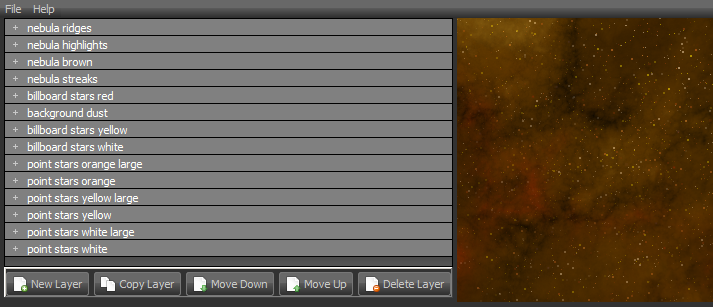
Finally, set Dest Blend Factor to one_minus_src_alpha and Source Blend Factor to srC_alpha. Set both Inner Color and Outer Color to black (0, 0, 0). By toggling the Layer Visible setting you can easily see the difference with and without dust layer. We can tweak the result even further by trying to move backgorund dust layer and/or the billboard star layers around. If we move the billboard stars red layer above the background dust layer, the red stars will be unobstructed by the dust and give a more red impression to the sky in general.
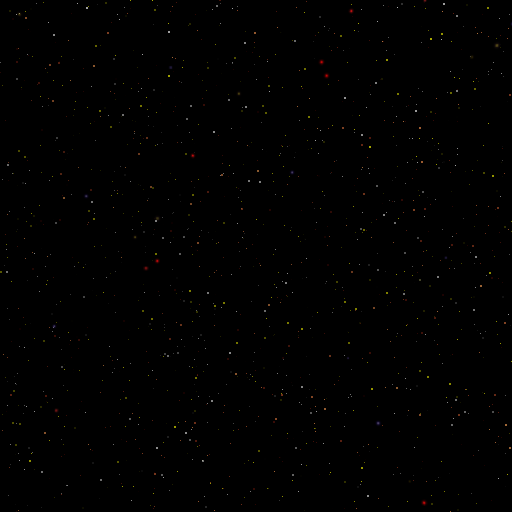
The result is a more tempered background starfield:
Foreground nebula layers
Nebula layer
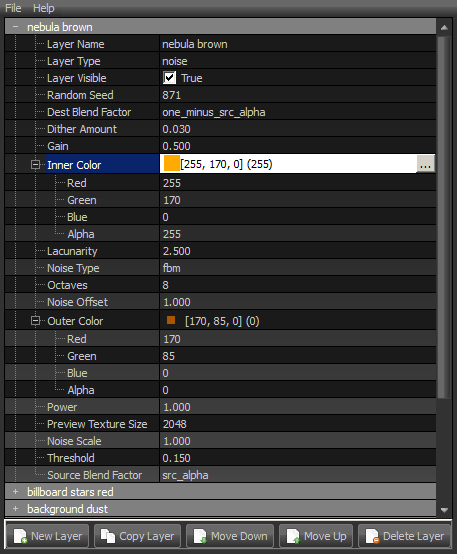
With the background starfield completed, we can start adding nebulae. Add a new layer and set the Layer Name to nebula brown and set the Layer Type to noise. We'll set a color gradient and make it transparent by using conventional alpha blending:
- Random Seed
- changing the random seed alters the shape of the nebula
- Dest Blend Factor
- set to one_minus_src_alpha
- Source Blend Factor
- set to src_alpha
- Inner Color
- Select a dominant, bright color
- Outer Color
- Select a darker shade ad set alpha to 0
Change the appearance;
- Lacunarity
- Set to 2.5 or experiment
- Octaves
- Set to 8 or experiment
- Threshold
- Give it a low value in the 0.00 to 0.25 range
Nebula highlights layer
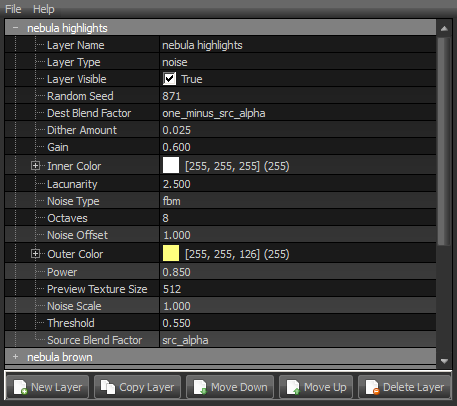
To make the nebula more interesting, we add a highlights layer. Make a copy of the nebula brown layer: select its node in the layer tree structure and clicke the Copy Layer button at the buttom. Set the Layer Name of the copy to nebula highlights. The highlights layer should have the same parameters and random seed as the original.
- Inner Color
- Set to a bright color, alpha to 255
- Outer Color
- Set to a bright color, alpha to 255
- Threshold
- Give it a higher value, around 0.5
- Power
- Make the highlights more subtle by decreasing power
- Gain
- Make the highlights sharper by increasing gain
Nebula ridges layer
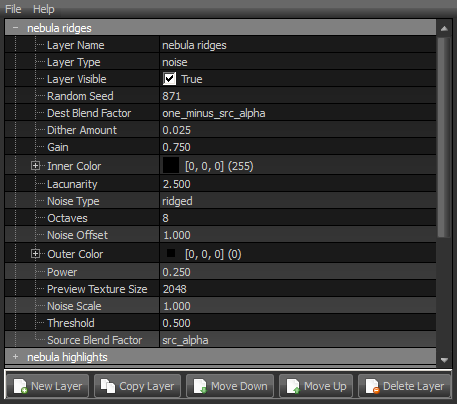
We improve the appearance of the nebula by adding a layer of dark ridges: add a new layer and set the Layer Name to nebula ridges, set the Layer Type to noise. Set the Noise Type to ridged.
- Random Seed
- I used the same random seed as the nebula and nebula highlights layers, this isn't required here but happened to look good
- Dest Blend Factor
- set to one_minus_src_alpha
- Gain
- increase to 0.750
- Inner Color
- set to black (0, 0, 0), set alpha to 255
- Lacunarity
- set to 2.5
- Octaves
- set to 8
- Outer Color
- set to black (0, 0, 0), set alpha to 0
- Power
- set to 0.250
- Threshold
- set to 0.500
- Source Blend Factor
- set to src_alpha
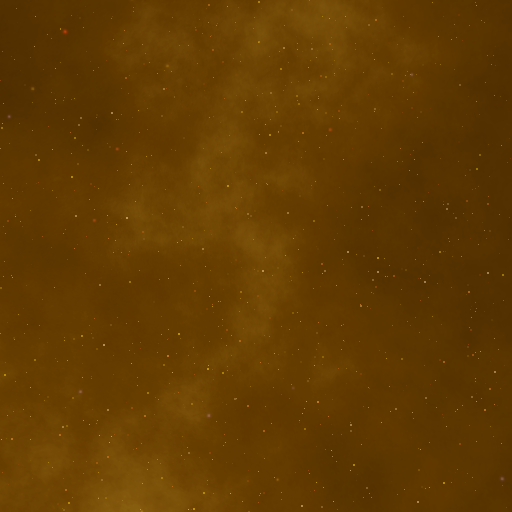
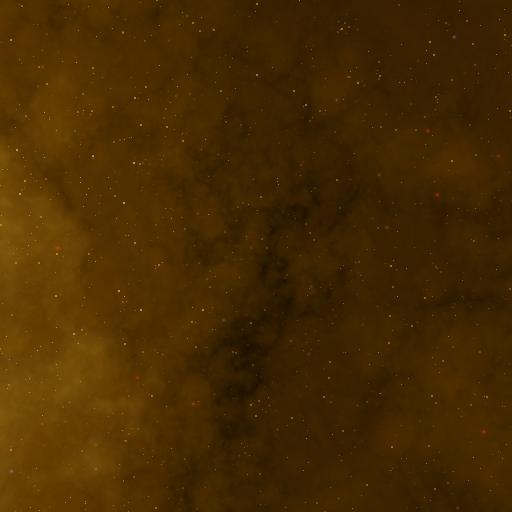
The result is a far more realistic looking nebula:
Nebula streaks layer
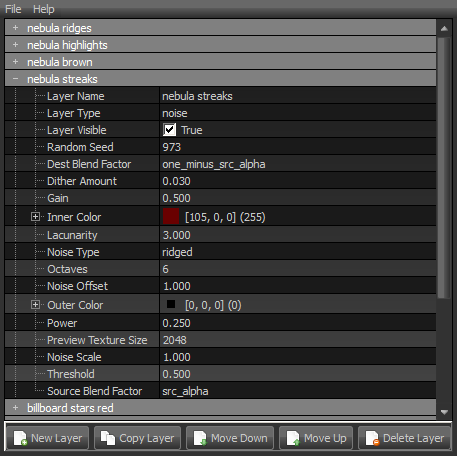
We add the final touch by creating a nebula streaks layer. Set the Layer Type to noise and the Noise Type to ridged.
- Random Seed
- don't forget to set the random seed
- Inner Color
- pick an approriate streak color, I've chosen a somewhat darker red tint.
- Lacunarity
- set to 3 to create a more sparse nebula
- Octaves
- set to 6
- Outer Color
- set to black (0, 0, 0), set alpha to 0
- Power
- set to 0.25
- Threshold
- set to 0.5
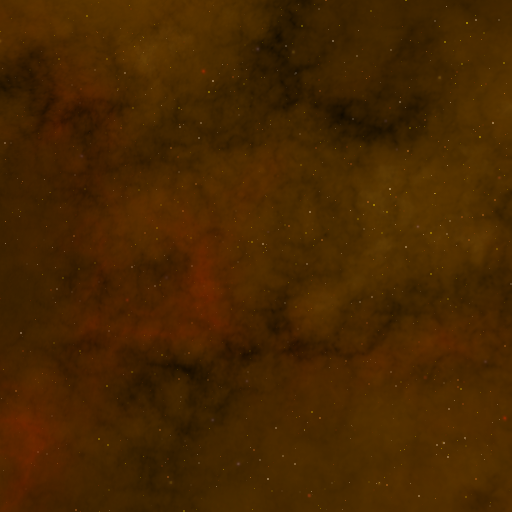
Moving the nebula streaks layer below the nebula brown layer makes it blend better with the other nebula layers:
Blending
- TODO: explain the blending modes.
These are standard OpenGL blending functions. See section 6.2.2 Explicit blend functions of the Quake 3 shader manual.
Exporting
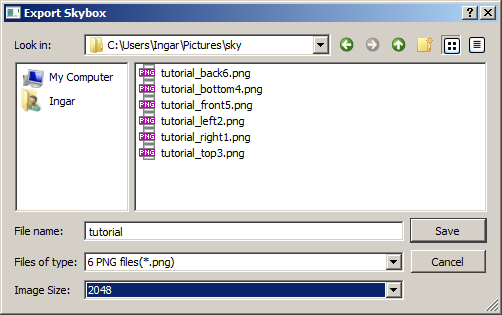
To export the skybox to 6 environment map images, select the the Export Skybox option in the File menu. This will save the skybox as 6 PNG or JPG images.
Select the desired resolution at the bottom. Use 2048 for Project::OSiRiON, use 1024 for Quake 3 based games. Tremulous and Unvanquished crash with skyboxes larger than 1024, Xonotic is reported to work with 2048 skyboxes.
For Project::OSiRiON, export to PNG and rename the images as follows:
tutorial_back6.png   -> tutorial_back.png
tutorial_bottom4.png -> tutorial_bottom.png
tutorial_front5.png  -> tutorial_front.png
tutorial_left2.png   -> tutorial_left.png
tutorial_right1.png  -> tutorial_right.png
tutorial_top3.png    -> tutorial_top.png
For Quake 3 compatible games, export to JPG or PNG. Rename the images as follows. Note that the right and left images are swapped.
tutorial_back6.png   -> tutorial_bk.png
tutorial_bottom4.png -> tutorial_dn.png
tutorial_front5.png  -> tutorial_ft.png
tutorial_left2.png   -> tutorial_rt.png
tutorial_right1.png  -> tutorial_lf.png
tutorial_top3.png    -> tutorial_up.png
Transform the images as follows:
- Rotate the top/up image 90 degrees counter-clockwise
- Rotate the bottom/down image 90 degrees clockwise
You might have to write a shader file:
textures/spacescape/tutorial
{
   qer_editorimage env/spacescape/tutorial_ft.png
   surfaceparm noimpact
   surfaceparm nolightmap
   surfaceparm sky
   skyparms env/spacescape/tutorial - -
}
The images should be copied to the env/spacescape folder inside your game data folder.
Remarks
- The settings in this tutorial are intended to export skyboxes to 2048x2048 image files. If you intend to export to a different resolution, you will have to alter the size and number of stars settings.

